Decorating a Composition Notebook

Notebook

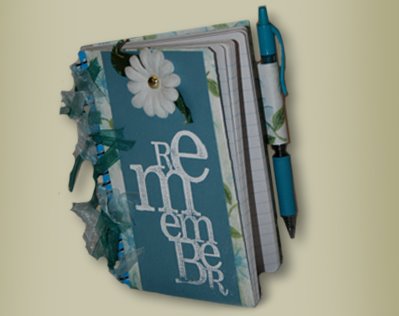
This is easy, just use any notebook you want, and glue scrapbook paper on to it, you can add embellishment and chipboard letters to it. Tie ribbon on to the spiral part of the notebook to add a fun look.

Here are some directions I found.

Materials:

  • 2 sheets of the same paper for the cover (cardstock or patterned), 8 ½ x 11 or larger

  • Optional: 2 sheets of the same paper for the inside (cardstock or patterned), 8 ½ x 11 or larger

  • 1 sheet of paper (cardstock or patterned), 8 ½ x 11 or larger

  • Optional: ribbon, buttons, or other embellishment

  • adhesive (and/or glue gun as needed)

  • paper cutter

  • scissors

  • ruler

Instructions:

1. Cut the 2 sheets of the cover paper (that are the same)

2. Using your adhesive, adhere one sheet to the front of the composition notebook and one to the back. The paper will not cover the binding.

3. Trim the corners of the paper to fit the curved edges of the notebook.

4. If you’d like to cover the binding, then cut the 1 sheet of paper 9 ½ x 2 ½ in. If the traditional black binding fits with the scheme of your journal, then leave it and skip to Step 6.

5. Using your adhesive, adhere the sheet to the binding. It may overlap just a bit, but that’s okay.

6. Optional: Cut the 2 sheets of the inside paper (that are the same) 9 ½ in x 7 ½ in.

7. Using your adhesive, adhere one sheet to the inside front of the composition notebook and one to the inside back of the notebook.

8. Trim the corners of the paper to fit the curved edges of the notebook.

9. Optional: Use your ribbon, buttons, or embellishments to decorate.

Ribbon –

1. Cut a piece of ribbon 20 in in length.

2. Using your adhesive, adhere the ribbon along the edge between your binding and cover starting on the front, wrapping around the inside of the journal, and returning to the starting point.

3. If you’d like, a the starting point tie a ribbon or place a button or other embellishment to give a seamless affect.

Buttons – Taking your buttons, simply adhere them along the edge between the binding and the cover paper. Then can be arranged in a straight line, rows, sporadically across the cover, or in a curvy line.

Embellishments – The placement of your embellishments will depend largely on the size and type of embellishment you have chosen, as well as the theme of your journal. The same guidelines may work well with your embellishments as for the buttons.

Add a pen

I added one using black elastic, and eyelet and E-6000 adhesive.  You can pick up these mini pens at places like Staples or Office Depot.

Information 06/25/2023

The time has come for me to be honest with myself,  that I just can't keep up with this site any more. I am working full time now and loving on my grandkids.  I will still be adding great quotes I find and things from General conference etc. Never fear, I am still here for you. If you need something please reach out to me, and I will See what I can do. You can reach me at theideadoor@gmail.com

Thanks for your understanding! Liz from the Idea Door

This will close in 30 seconds