Instructions for Placemat Tote

I have added pictures of the one we did, plus the instructions I found online, it is pretty easy, fold it in half in side out, sew up the sides, then do Step 6, that is what will make the bottom flat. Add handles, ribbon etc and you are done!
Materials Needed:
|
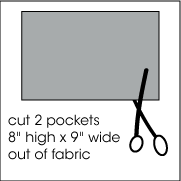
Cut two pockets out of fabric 9″ wide by 8″ tall. If you are working with fabric scraps, you can adjust the pocket’s height. You don’t want to adjust the width as that will put your webbing straps too close together. Don’t forget you could also piece your pocket. |
Fold top of both pockets over 1/2″ twice to finish top. Topstitch 3/8″ below top to secure. |
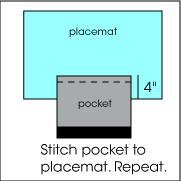
With right side of pocket facing the right side of the placemat and the pocket upside down, place pocket on placemat. Find center of the placemat (by folding in half) and align it with the center of the pocket. Stitch pocket along bottom to placemat. Repeat for other side. |
Stitch webbing to placemat covering sides of pocket. Stitch both edges of the webbing up to the top of the placement. This forms your handles and covers the raw edges of your pocket. Use the ribs of the placemat as a guide to keep the webbing straight. Repeat for other side, ensuring the webbing lines up at the of the placemat. |
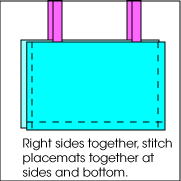
With right sides together, sew placemats together at sides and bottom. Match the webbing at the top and adjust the placemat position if necessary. Use a 1/2″ to 5/8″ seam allowance and don’t forget to backstitch (reverse) at the top- this is where the tote will get the most stress. |
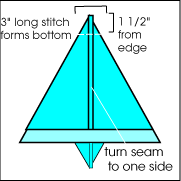
This forms the bottom of the purse. Take one side seam you just sewed and place it on top with the top of the bag toward you (the bag is shown upside down). Force the bag to flatten with the bottom of the side seam forming the top of the triangle. Stitch across the triangle as shown, 1 1/2″ from the point of the triangle, which will make a 3″ stitch. Again, make sure you backstitch. It’s too difficult to open up the seam allowance, so just turn the seam allowance to one side or the other. Do the same on the other seam. |
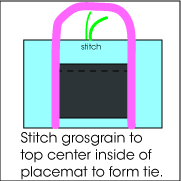
Turn bag right side out. Your bag is now basically finished except for the tie closure. Center the 5/8″ between the straps on the inside of your bag. Fold under the raw edge and stitch. Do the same on the other side. Simply clip the grosgrain to length in a diagonal to prevent fraying. |
 Step 1:
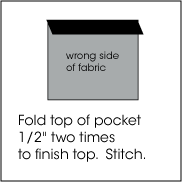 Step 2:
 Step 3:
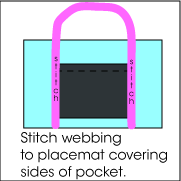 Step 4:
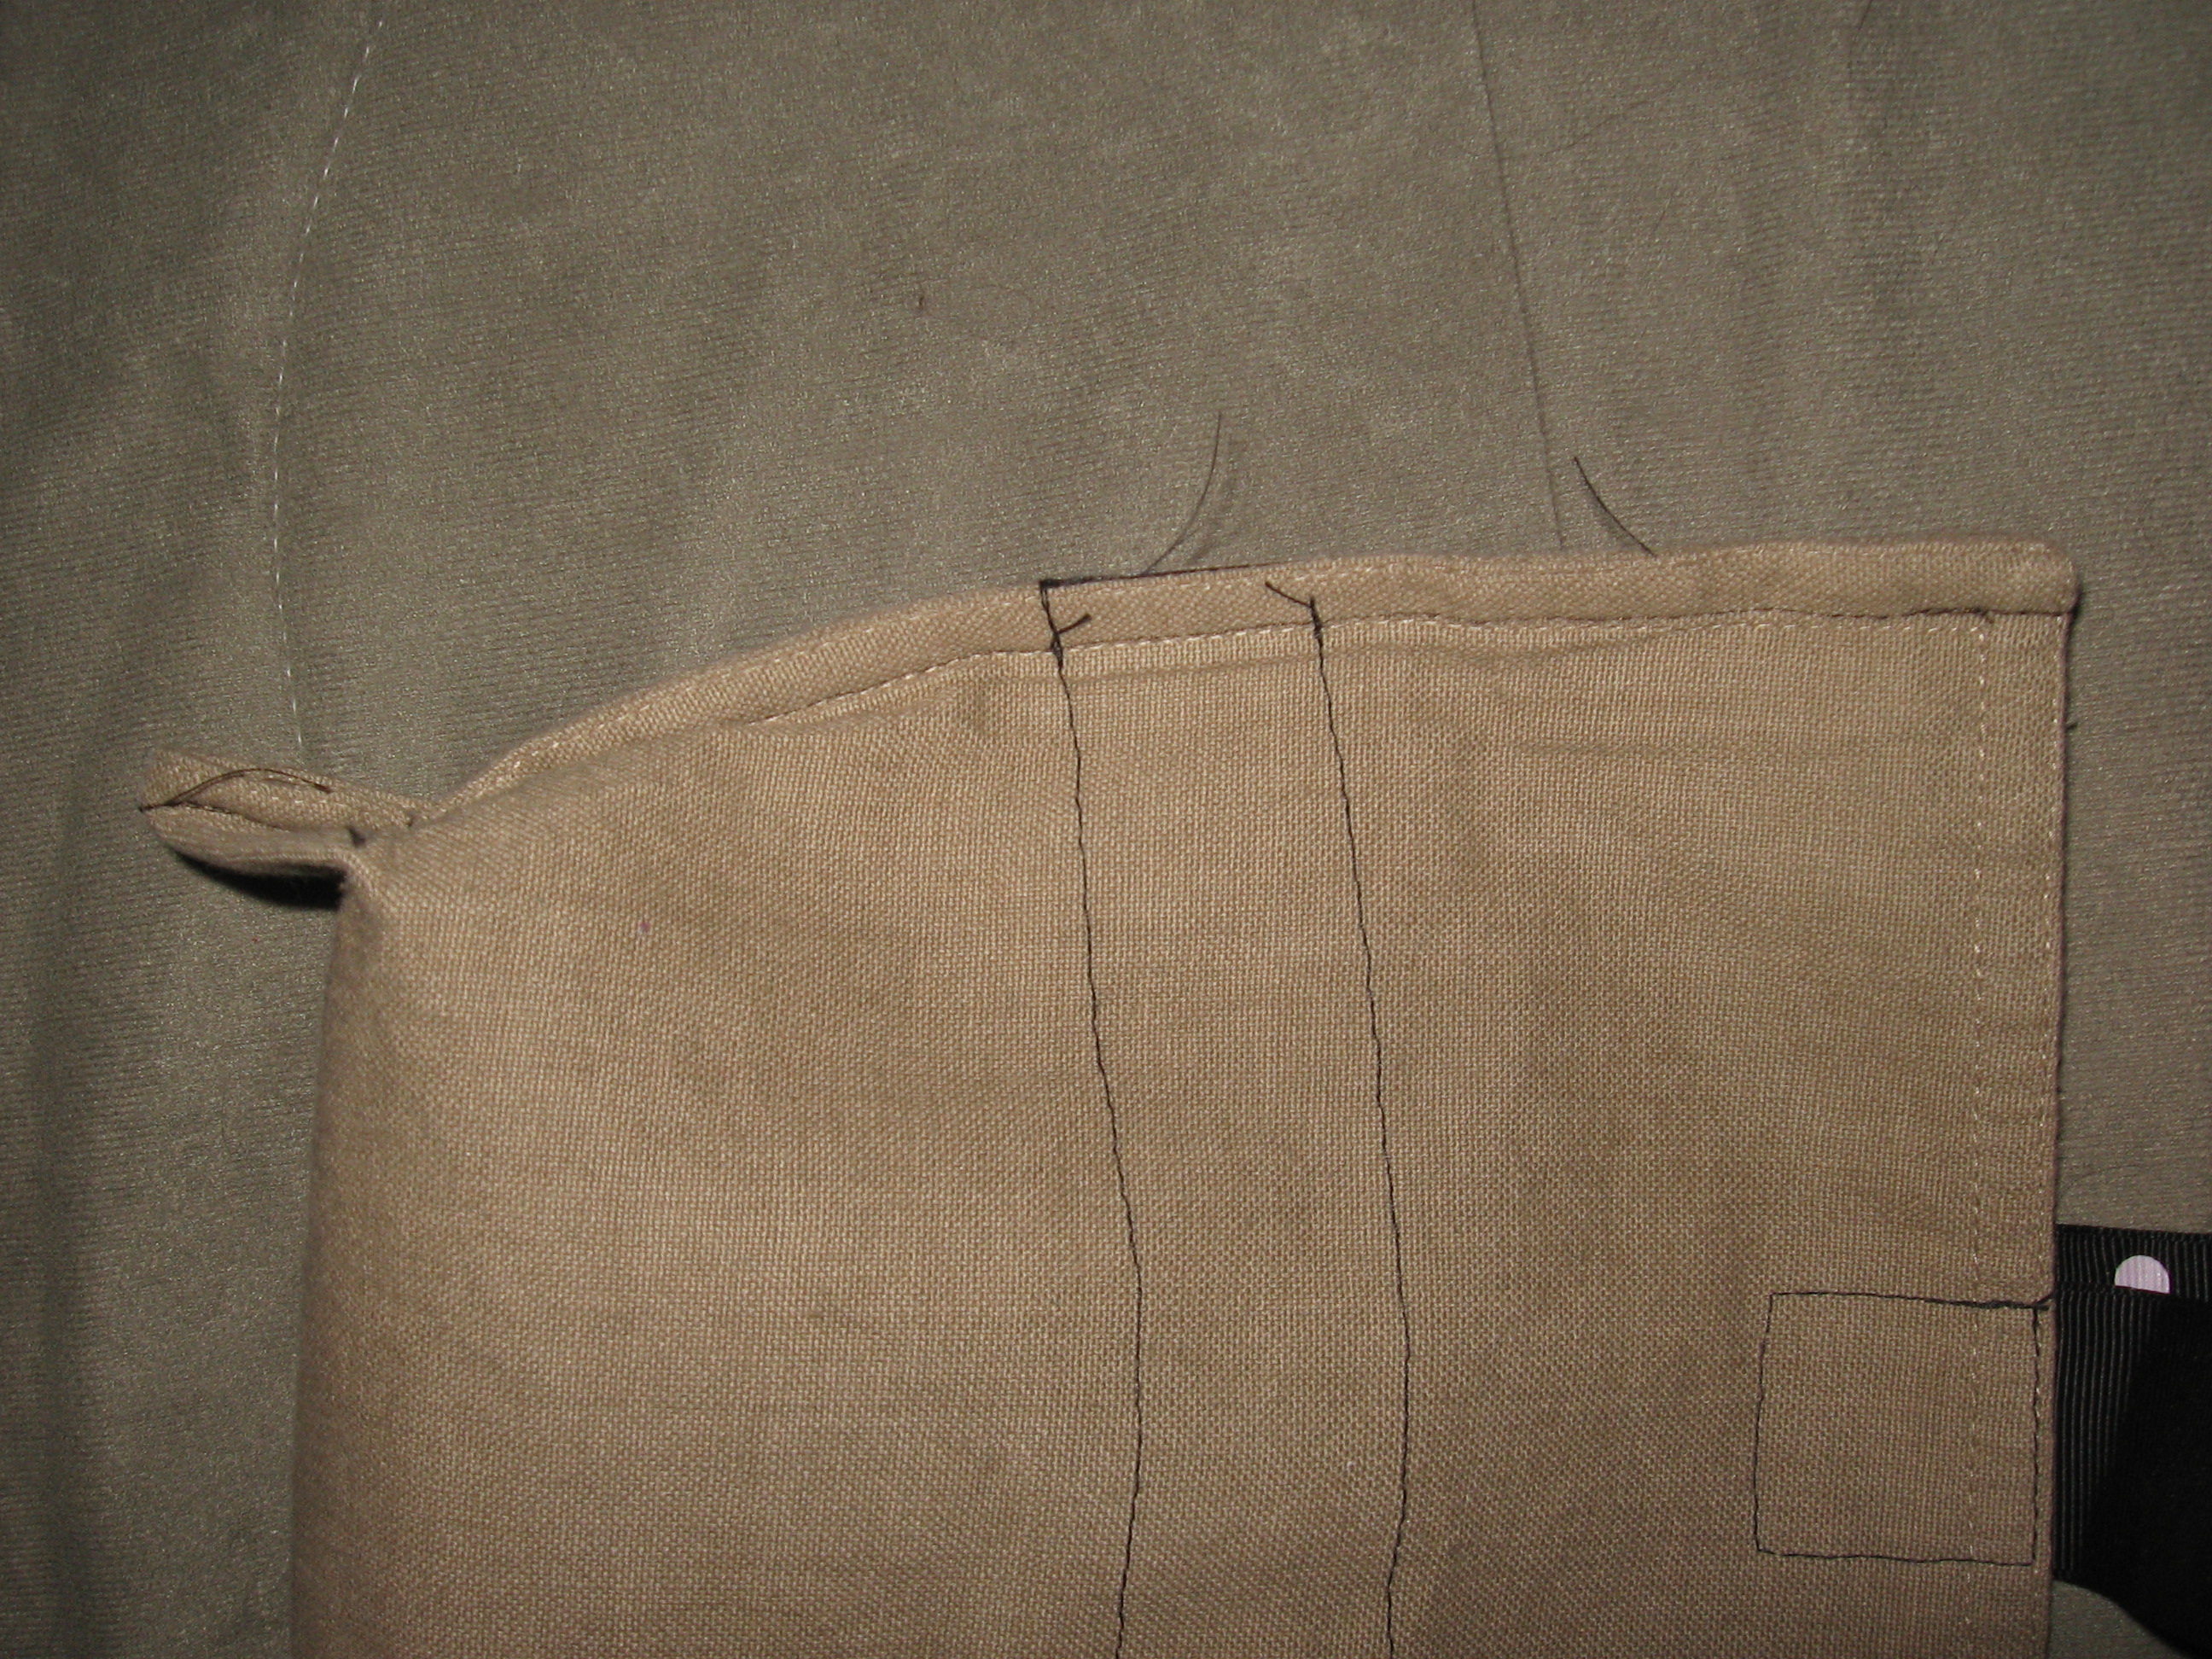
 Step 5:
 Step 6:
 Step 7: